Pull out the scrapbooking supplies... and go on Pinterest to make her Christmas present.
After some searching, I found pins detailing smash journals and various travel journals and knew I had a winner. Thankfully, I already had a pack of appropriate paper from Walmart (Colorbok) and plenty of other supplies - twine, scrapbooking squares, fancy scissors. Off I went to Michaels - and let me tell you, friends. Michaels has amazing sales. Basically the Kohl's of the craft world... Thanks to, first, a 50% off coupon and then 3 uses of a 40% off coupon 3 days in a row, I managed to get all of these supplies for super, super cheap. Google "Michaels coupons".
What you're about to see - drumroll - is my version of a travel journal. The goal was to make something in which my friend had plenty of room to write, paste pictures, and insert "paper souvenirs".
First, I started with a regular 6x8, 80-page, unlined journal from Michaels. I wanted thicker pages - not your regular notebook thickness - so they could actually hold some weight.

I really didn't want something with words on the cover, since I wanted to decorate the cover. However, this phrase ended up fitting very well with the whole theme of the journal.
The rest of the supplies were pretty basic - a few different kinds of scissors, glue sticks, super glue, Bic markers, a black fine tip Sharpie, scrapbook paper, scrapbooking squares, rulers, glitter, stickers, charms, twine, and quotes I designed and printed on beige cardstock.

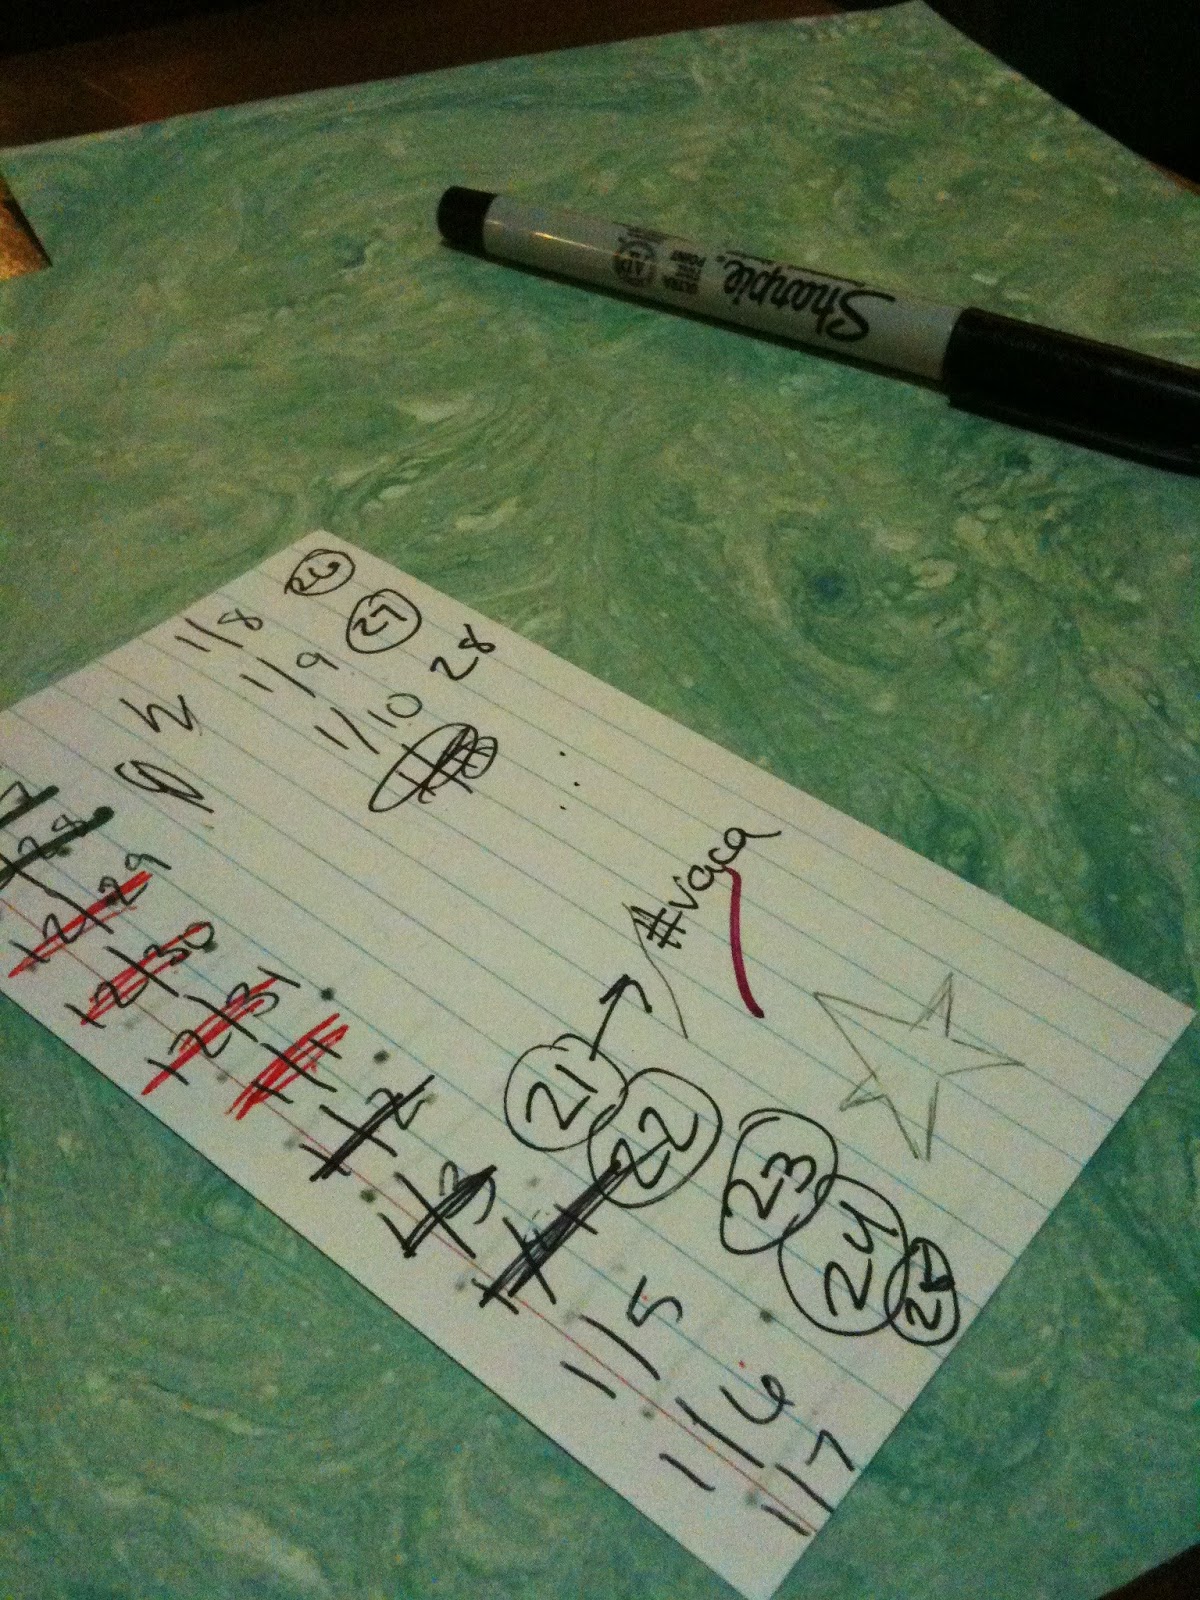
Can you tell I'm OCD/type A? I wrote down every single day she would be gone on an index card so I could keep track of how many pages I had made already and how many were left. This also really helped me lay out the journal, since she will be in more than one state during her vacation - thanks to the index card, I could design certain pages differently based on where she would be.

I am inordinately proud of the above page (the cover page). It was easy to make - write each letter of her name in a different style on my handy-dandy cardstock, cut out a modified circle and paste on scrapbook paper, cut out another modified circle, and slap it all on the page. However, deciding how to lay out the letters was NOT fun. In retrospect, I should have taken a closer look at the amount of space I had on the page before recklessly cutting all those letters so big.

Obviously, I just grabbed pieces of scrapbook paper and started cutting. The imperfect circles were super fun, since I can't cut a circle to save my life. Notice how these layouts are extremely simple. I left a lot empty so she could write and paste everything in the journal.

I think the biggest thing, for me, about this journal was the fact that it was such a mishmash of colors and styles. Some of it was typed, most of it was handwritten (and no, I am not that girl with gorgeous handwriting). A lot of it was romantic/modern vintage in style, but there were smidgens of modern black and white and bright colors. I really liked this, because I honestly think perfect projects are not only very discouraging to try, but also unrealistic, especially for someone with OCD (like me). So, the point to that little dissertation is: it's completely and totally fine if you hand write a quote on your paper and glue that in. Mix up the colors. Switch back and forth from styles. And, this is supposed to be accessible, right? So, you will probably not have time (or want to take the time) to type everything you want to say on the computer, format it, and print it. That is a-ok.


I admit it, I think like a teacher. However, what else are you supposed to do when there will be a 5-year-old on this trip as well? You just have to give them a space to journal (i.e. color, doodle, and write down hilarious stuff). I put two sections of these "kid pages" through the journal. These were, frankly, the easiest ones to make, since all those letters, frames, symbols, etc. were premade and perforated. Can I get a cheer?


One of my favorite web resources is Dafont. This site has thousands of free fonts in all different styles - Gothic, Serif, Celtic, Script, Wingdings, Christmas, etc. All of the fonts I used in this project, except for about two, were downloaded from Dafont.

I think the two pages on the left were some of the best in the whole project. If someone is going to an amusement park, you just have to incorporate tickets in there somehow... and I found a whole 12x12 sheet of paper covered with tickets at Michaels. To make the pocket on the left, just cut a triangular piece out of your paper, slap glue (not scrapbooking squares) on the two legs of the triangle, and align it with the edge of your paper. This is a basic, redneck-style pocket. (At least I think so - there are some serious pocket tutorials out there that I would love to do.)


I love, love, love this Emerson quote:
Though we travel the world over to find the beautiful, we must carry it with us, or we find it not. Perfect for a travel journal, right? I thought so.

Finally, one last detail: a bookmark. This was so easy. Take three strands of twine, cut about 3 inches longer than the length of your notebook (in this case, 11 inches). You're going to braid them together, so you have to tie the tops together. Just tie two of them together and then add the third one in and make a second knot. Braid until you have about an inch left. Then, take a charm (again, I found mine at Michaels, but these are literally all over the place - your choice) and thread one of the strands of twine through the loop. Braid the strands again about 1-2 times, then fold them back up against the long braid on whatever side is the back of your charm. Hold them there and dab super glue on near the bend so they will stick to the main braid. Once the glue dries, cut off the end of the braid (you see why I glued it at the bend, not at the very end. Oooh. Rhymes.) You will probably have to put something heavy on top of the bookmark for a little bit to straighten it out.
Next, open up your notebook farther than 180 degrees - this may depend on your notebook and how it's built, but the outside binding on this notebook wasn't glued to the spine. This gave me a little hole to stick things into, so I used a pencil to spread super glue down the inside of the hole and then stuck the top end of the bookmark in there, shut the notebook tight, and clamped it down so it could dry.
 |
| Gotta have a hashtag, right? |
I think that the biggest piece of advice I have is: don't get a journal with eighty pages!! It ended up being way too many for the timeframe I had to work on this. If you know you're making this project a month in advance, and you start a month in advance, you can fill all eighty pages. If you try to do it in five days, no way, Jose. Ain't happening. And, related to the journal question - if you can find something along the lines of a sketchpad with non-perforated pages or a spiral notebook with thick paper, my guess is that it will be a lot easier to work with.
I hope this post gives you some ideas or some inspiration! Go out there and do something... remarkable.
What an original quote.
